If you’ve ever jumped straight into a workout without warming up — or finished a session and immediately sat down on the sofa — you’re not alone. Most people skip both the warm-up and cool-down routine, either because they’re short on time or simply don’t realise how much difference these few extra minutes make. But here’s the thing: a solid warm-up and cool-down routine is one of the simplest upgrades you can make to your home workouts. It helps you move better, perform better, recover faster, and stay injury-free for the long haul. Whether you’re doing HIIT, yoga, strength training, or a quick 15-minute circuit, this guide covers everything you need to know.
What Actually Happens When You Skip Your Warm-Up and Cool-Down?
Think of your body like a car on a cold morning. You wouldn’t floor the accelerator straight away — you’d let the engine warm up first. Your muscles, joints, and cardiovascular system work the same way.
When you skip your warm-up, you’re essentially asking cold, stiff muscles to work at full intensity. That increases your risk of strains, pulls, and joint pain. Similarly, when you skip the cool-down, your heart rate drops too fast, your muscles tighten up overnight, and you often feel more sore the next day than you would otherwise.
Over time, those skipped cool-downs also chip away at your flexibility and mobility — two things that become increasingly important as you stay active.
Why Your Warm-Up and Cool-Down Routine Matters More Than You Think
A good pre-workout warm-up does far more than just raise your heart rate. It wakes up your nervous system, lubricates your joints, increases blood flow to your muscles, and gets your brain ready to move with purpose. Research consistently shows that dynamic warm-ups improve athletic performance, reduce injury rates, and even help with focus during exercise.
On the flip side, a proper cool-down routine signals your body that it’s time to shift from “work mode” back to rest. It helps flush out lactic acid, reduces post-workout inflammation, calms your nervous system, and encourages flexibility gains through static stretching — something that’s actually counterproductive to do before a workout.
In short, if you want to get more out of every session and feel better doing it, building a consistent warm-up and cool-down routine is one of the smartest moves you can make. It’s also one of the most overlooked, especially among people working out at home.
The Science Behind a Proper Warm-Up Routine
There’s actual science behind why warming up works. When your body temperature rises even slightly, your muscles become more pliable, your reaction time improves, and oxygen delivery to working muscles becomes more efficient. Your connective tissue — tendons and ligaments — also becomes more elastic and less prone to tearing.
Dynamic movements during a warm-up also activate the neuromuscular pathways between your brain and the muscles you’re about to use. That means better coordination, more power output, and more controlled movement throughout your workout. Think of it as running a quick systems check before you ask your body to perform.
The key here is that a good warm-up is active, not passive. Static stretching before exercise — the kind where you hold a stretch for 30 seconds — has actually been shown to reduce power output temporarily. So save that for the end. Before your workout, focus on movement.
How to Build the Perfect Home Warm-Up Routine
The good news is that an effective warm-up doesn’t need to be complicated. A solid home warm-up routine follows four simple stages, and the whole thing takes just 5 to 10 minutes.
Stage 1: Light Cardio to Raise Your Core Temperature (2–3 Minutes)
Start with low-intensity movement to get your blood pumping and your body temperature up. You’re not trying to tire yourself out here — just gently wake everything up. Great options include marching on the spot, light jumping jacks, arm circles, step touches, or a slow jog around the room. Keep the effort at about a 3 out of 10. You should feel warmer, but you shouldn’t be breathless.
Stage 2: Dynamic Mobility Work for Your Joints (2–3 Minutes)
Next, move through the major joints you’ll be using in your workout. Dynamic mobility means moving through a range of motion, not holding a stretch. This increases joint lubrication and prepares your connective tissue.
Some excellent dynamic mobility exercises include:
- Leg swings — forward and side to side, 10 reps each leg
- Hip circles — hands on hips, rotate slowly in each direction, 8 reps per side
- Arm circles — small to large, 10 forward and 10 backward
- Torso twists — feet shoulder-width, rotate through your upper body, 10 reps per side
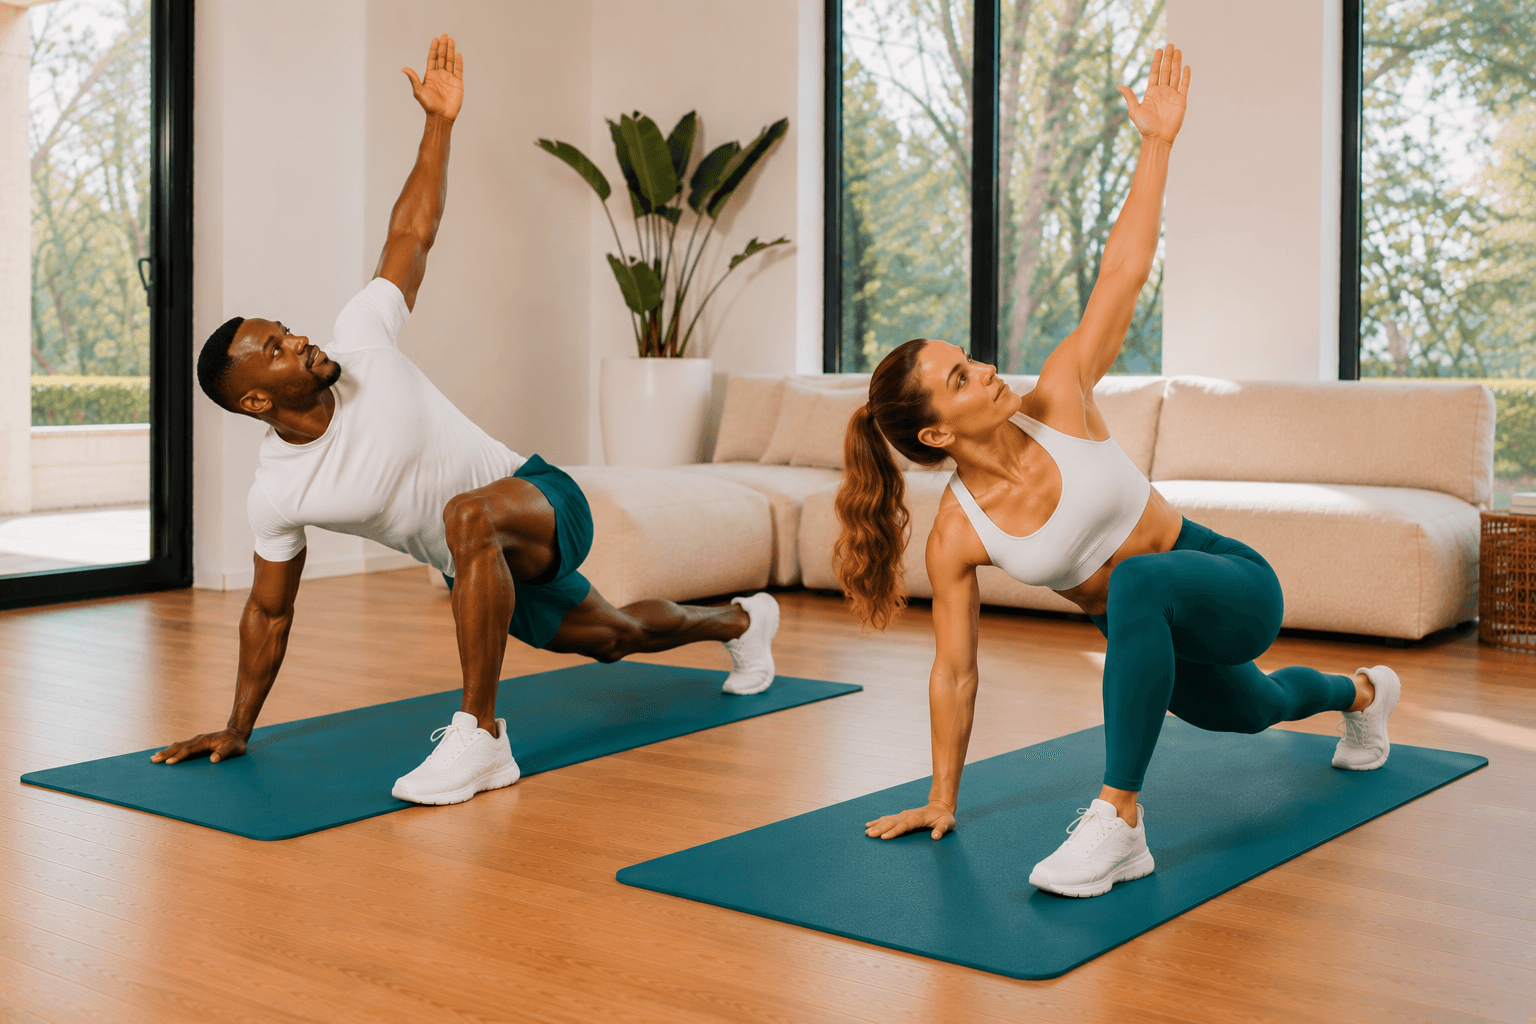
- World’s greatest stretch — a deep lunge with a thoracic rotation, 5 reps per side
- Ankle rolls — especially important before any running or jumping
Stage 3: Muscle Activation Exercises (2 Minutes)
Activation exercises improve the communication between your brain and the specific muscles you’ll be relying on. Think of this as switching everything on before asking it to work hard. These are especially important for people who sit for long periods during the day, since muscles like the glutes can become underactive and slow to respond.
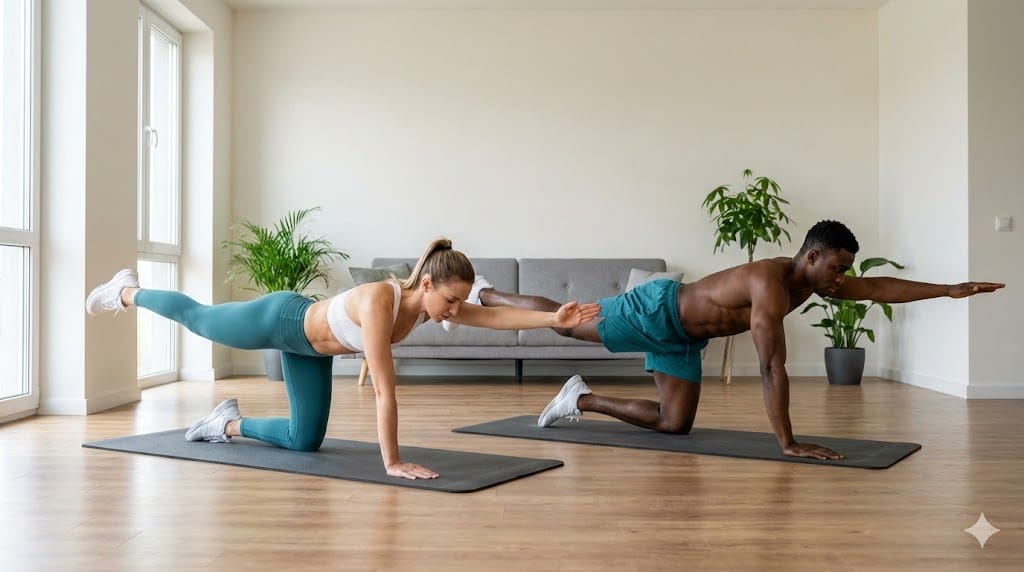
Effective activation exercises to include:
- Glute bridges — 10 reps, pause and squeeze at the top
- Bird dogs — 8 reps per side, slow and controlled (great for core and lower back)
- Bodyweight squats — 10 to 15 slow reps focusing on depth and posture
- Dead bugs — 8 reps per side to engage deep core muscles
- Standing knee raises — 20 alternating reps for hip mobility and balance
Stage 4: Rehearse Your Workout Movements (1–2 Minutes)
Finally, run through slower or easier versions of the actual movements you’ll be doing in your session. This is called movement rehearsal, and it significantly reduces the learning curve for your body when you hit full intensity.
For example, if you’re about to do a leg workout, perform some slow bodyweight squats. If your session includes push-ups, start with incline push-ups on the wall or a couch. If you’re doing HIIT, run through the movements at half speed first. This stage is quick, but it’s incredibly effective.
Looking for a great workout to follow your warm-up with? Check out our Ultimate At-Home HIIT Workout or the 15-Minute Full Body Home Workout — both are designed to follow a solid warm-up routine.
Your 5-Minute Quick Warm-Up Routine (When You’re Short on Time)
We get it — life is busy. On days when you’re squeezed for time, here’s a fast but effective warm-up routine you can run through in just five minutes. It covers all the basics and leaves you ready to work.
| Exercise | Duration / Reps |
|---|---|
| Marching on the spot | 60 seconds |
| Arm circles (both directions) | 30 seconds |
| Hip circles | 30 seconds per side |
| Leg swings | 10 per leg |
| Glute bridges | 10 reps |
| Bodyweight squats (slow) | 10 reps |
| Movement rehearsal (your workout moves) | 30 seconds |
That’s it. Five minutes, zero excuses. Even on your busiest days, this quick pre-workout warm-up makes a real difference to how your body feels and performs.
The Science Behind Cool-Down Routines and Recovery
Just as important as the warm-up is how you end your session. When you exercise intensely, your heart rate climbs, your muscles contract repeatedly, and your nervous system goes into high gear. Abruptly stopping can cause blood to pool in your extremities, leading to dizziness or lightheadedness. A gradual cool-down prevents this.
Beyond cardiovascular safety, the cool-down is your recovery window. This is the ideal time for static stretching, because your muscles are warm, pliable, and more responsive to lengthening. Static stretches held for 30 to 60 seconds after exercise have been shown to reduce DOMS (delayed onset muscle soreness) and gradually improve flexibility over time — something dynamic stretching before a workout simply can’t do.
A good cool-down routine also activates the parasympathetic nervous system — your body’s “rest and digest” mode — which lowers cortisol, reduces inflammation, and helps you transition mentally from workout mode to the rest of your day. Pair it with slow, controlled breathing and the effects are even more pronounced.
How to Build the Best Post-Workout Cool-Down Routine at Home
A good home cool-down routine flows through three stages: slowing down your cardiovascular system, releasing muscular tension, and restoring your breathing. Here’s how to approach each one.
Stage 1: Gradual Cardiovascular Wind-Down (2–3 Minutes)
Immediately after your workout finishes, don’t sit down. Instead, walk slowly around the room, shake out your arms and legs, and let your heart rate drop naturally. This gradual decrease in intensity prevents blood pooling and keeps you feeling good. Think of this as the reverse of your warm-up — you’re asking your body to step back down, one gear at a time.
Stage 2: Diaphragmatic Breathing to Calm Your Nervous System (1 Minute)
Once your heart rate has dropped a little, stand or sit comfortably and focus on your breath. Try box breathing: inhale for four counts, hold for four, exhale for four, hold for four. Alternatively, simply breathe in deeply through your nose and out slowly through your mouth.
This breathing phase is surprisingly powerful. It signals to your nervous system that the stress is over, reduces cortisol, and prepares your body to absorb the benefits of stretching more effectively. Many people skip this step and go straight to stretching, but taking 60 seconds to regulate your breath first makes a meaningful difference.
Stage 3: Static Stretching to Improve Flexibility and Reduce Soreness (5–7 Minutes)
Now it’s time for static stretches. Hold each one for 30 to 60 seconds, breathe steadily throughout, and avoid pushing to the point of pain. Mild discomfort is okay — sharp pain is not. Focus on the muscles you worked hardest during your session, but also include the major muscle groups for a balanced recovery.
Key stretches to include in your cool-down routine:
- Standing quad stretch — hold your ankle behind you, keep your knees together, 30 seconds per side
- Seated hamstring stretch — legs extended, reach toward your feet, 30 to 45 seconds
- Hip flexor lunge stretch — one knee on the floor, lean forward gently, 30 seconds per side
- Pigeon pose or figure-four stretch — excellent for glutes and outer hip, 45 seconds per side
- Child’s pose — a restorative stretch for the lower back, hips, and lats, hold for 60 seconds
- Cat-cow stretch — 8 to 10 slow repetitions to decompress the spine
- Chest and shoulder stretch — clasp hands behind your back and lift gently, 30 seconds
- Cross-body shoulder stretch — pull one arm across your chest, 30 seconds per side

Your 5-Minute Quick Cool-Down Routine (For Busy Days)
Even when you’re pressed for time, don’t skip this. Five minutes is genuinely enough to give your body what it needs after a workout. Here’s a simple, efficient cool-down you can do anywhere at home.
| Exercise | Duration |
|---|---|
| Slow walk / shake out | 60 seconds |
| Deep breathing (box breath) | 60 seconds |
| Seated hamstring stretch | 30 seconds each side |
| Standing quad stretch | 30 seconds each side |
| Child’s pose | 60 seconds |
Simple, effective, and easy to repeat after every single session. Your muscles will thank you tomorrow morning.
The Complete 10-Minute Cool-Down Routine for Longer or Intense Sessions
After a challenging HIIT session, a heavy leg workout, or any session lasting more than 30 minutes, it’s worth spending a little extra time recovering. Here’s a full 10-minute cool-down routine that hits all the major bases.
| Exercise | Duration |
|---|---|
| Slow walk and shake out | 2 minutes |
| Box breathing | 1 minute |
| Seated hamstring stretch | 1 minute |
| Standing quad stretch | 1 minute (30 sec per side) |
| Hip flexor lunge stretch | 1 minute (30 sec per side) |
| Pigeon pose / figure four | 1 minute (30 sec per side) |
| Chest and shoulder stretch | 1 minute |
| Child’s pose | 1 minute |
| Cat-cow stretch | 1 minute |
Warm-Up and Cool-Down Routines Tailored to Your Workout Type
Not all workouts are the same, and your warm-up and cool-down routine should reflect that. Here’s a quick breakdown of how to adapt yours based on what you’re doing.
Before and After a HIIT Workout
HIIT is high-intensity by definition, so your warm-up needs to be thorough. Spend at least 7 to 8 minutes preparing, with an emphasis on raising your heart rate and mobilising your hips, knees, and ankles. After the session, your cool-down should include plenty of breathing work since your heart rate will be significantly elevated. Focus on lower body stretches as your legs will have taken the most load. Check out our 20-Minute No-Equipment HIIT Workout if you’re looking for a structured session to work with.
Before and After a Strength or Bodyweight Workout
For strength-focused sessions, muscle activation is especially critical in your warm-up. Make sure the muscles you’re targeting are firing properly before you add load or reps. After the session, spend extra time on the muscle groups you trained — if it was upper body day, focus on chest, shoulder, and tricep stretches. If it was leg day, prioritise quads, hamstrings, and glutes. Our Ultimate Upper Body Home Workout and No-Equipment Leg Workout both pair well with the warm-up and cool-down routines described here.
Before and After a Yoga or Mobility Session
For gentler sessions like yoga, your warm-up can be lighter — a few minutes of gentle movement and joint circles is often enough. The cool-down, however, is actually built into most yoga sessions themselves through poses like savasana. If you’re following our Yoga for Beginners 15-Minute Routine, you’re already handling this beautifully.
Before and After a Full Body Circuit
Full body workouts mean you’re using everything, so your warm-up needs to prepare everything too. Run through the full four-stage warm-up above rather than cutting corners. Your cool-down should be comprehensive as well — include stretches for your upper body, core, and lower body rather than focusing on just one area.
Common Warm-Up and Cool-Down Mistakes to Avoid
Even people who do warm up and cool down can fall into habits that reduce the effectiveness of these routines. Here are the most common mistakes and how to avoid them.
Doing static stretches before your workout. Holding stretches before exercise can temporarily reduce power and performance. Always save long static holds for after your session and keep your pre-workout movements dynamic.
Rushing through it. A two-minute warm-up before an intense 30-minute session isn’t really a warm-up — it’s just going through the motions. Give your body the time it needs. Five to ten minutes is the minimum.
Only stretching what’s sore. A balanced cool-down should cover all major muscle groups, not just the ones that feel tight. Tight spots are often a symptom of weakness or compensation patterns elsewhere, so address the whole body.
Skipping the breathing work. The breathing component of a cool-down is underestimated by almost everyone. It directly influences your nervous system and recovery speed. Don’t skip it.
Doing the same warm-up for every workout. Your warm-up should match your session. A light jog warm-up might be fine before a run, but before a heavy squat session you want glute activation, hip mobility, and movement rehearsal — not just cardio.
Want to avoid workout injuries altogether? Our post on How to Prevent Home Workout Injuries goes deep on all the ways to train smarter and stay pain-free.
Warm-Up and Cool-Down Routine for Beginners: Where to Start
If you’re new to working out at home, the idea of adding a warm-up and cool-down routine on top of your actual workout can feel like a lot. The truth is, starting simple is completely fine. You don’t need a perfect routine from day one — you just need to build the habit.
For beginners, try this approach: spend three to five minutes before your workout doing light marching, arm circles, and two or three of the activation exercises above. After your session, walk it off for a minute, take three deep breaths, and hold two or three basic stretches like child’s pose and a quad stretch. That’s genuinely enough to start with.
As your fitness improves and your sessions get more demanding, you can gradually extend your warm-up and cool-down to match. The most important thing at the beginning is simply making it a consistent part of every workout — however short.
If you’re just starting out, our Bodyweight Training for Beginners Complete Guide is a great place to start your journey alongside this warm-up and cool-down guidance.
How a Warm-Up and Cool-Down Routine Helps with Mobility and Flexibility Long-Term
One of the most underappreciated benefits of a consistent warm-up and cool-down routine is what it does for your mobility and flexibility over time. Because cool-downs involve static stretching when your muscles are at their warmest, you’re actually creating the best possible conditions for lasting flexibility improvements.
Similarly, the dynamic mobility work in your warm-up gradually increases your joint range of motion over weeks and months of consistent practice. Many people who struggle with tight hips, a stiff back, or limited shoulder mobility find that these issues improve significantly just from being consistent with their warm-up and cool-down routines — without ever following a dedicated flexibility programme.
If mobility is a specific goal for you, our Ultimate Home Mobility Routine pairs beautifully with the principles in this guide and takes things even further.
Follow Along with Sanook Fit
We share warm-up and cool-down routines, full home workouts, mobility sessions, and plenty of beginner-friendly fitness content across all our platforms. Whether you prefer video walkthroughs or written guides, there’s something for everyone.
Follow us and join the community:
- 📺 Sanook Fit on YouTube — full workout videos and guided routines
- 🎵 Sanook Fit on TikTok — quick tips, exercises, and daily inspiration
- 📘 Sanook Fit on Facebook — community updates and motivation
- 📸 Sanook Fit on Instagram — visual workout inspiration and behind-the-scenes content

Frequently Asked Questions
How long should a warm-up be before a home workout?
For most home workouts, a 5 to 10-minute warm-up is enough. Shorter, lower-intensity sessions might only need 5 minutes, while longer or more intense workouts benefit from a full 8 to 10 minutes of preparation. The key is that you feel genuinely warm and mobile before you start — not just like you’ve ticked a box.
Is it okay to skip the warm-up if I’m short on time?
Honestly, it’s better to do a shorter workout with a proper warm-up than a full workout without one. Even a 3-minute light cardio and activation sequence is significantly safer than jumping straight into intense exercise. If you’re truly pushed for time, shorten the main workout instead of cutting the warm-up.
Should I stretch before or after a workout?
Both — but differently. Before your workout, use dynamic stretching, which means moving through a range of motion rather than holding a position. After your workout, use static stretching, where you hold a stretch for 30 to 60 seconds. This distinction matters because static stretching before exercise has been shown to temporarily reduce muscle power output.
What’s the best cool-down after HIIT?
After HIIT, prioritise your breathing first — your heart rate will be high and your nervous system will be fired up. Walk slowly for two minutes, then spend at least a minute on diaphragmatic breathing before moving into stretches. Focus on your quads, hip flexors, hamstrings, glutes, and shoulders, as these are the muscles most commonly worked in HIIT. Allow at least 8 to 10 minutes total for a thorough cool-down after a tough session.
Do warm-up and cool-down routines help with weight loss?
Indirectly, yes. Warming up properly lets you push harder during your actual workout, which means more calories burned. Cooling down effectively supports recovery, which means you can train more frequently without burning out. Over time, consistency is the biggest driver of fat loss — and good warm-up and cool-down habits make it much easier to stay consistent.
Final Thoughts: Make Your Warm-Up and Cool-Down Routine Non-Negotiable
There’s a reason every good trainer, athlete, and fitness programme includes a warm-up and cool-down — because they work. These aren’t just extras you do when you have time. They’re an integral part of training smartly and sustainably, especially when you’re working out at home without a trainer to guide you through.
Start with the five-minute versions if time is tight. Build up from there. Before long, warming up and cooling down will feel as natural as the workout itself — and your body will feel better, move better, and recover faster as a result. That’s a trade worth making every single time.
Ready to put it all into practice? Try the 15-Minute Full Body Home Workout paired with the warm-up and cool-down outlined above. And if you’re looking for more no-equipment home workout ideas, explore everything on Sanook Fit — we’ve got you covered from warm-up to cool-down and everything in between.